HuggingFace Transformers 基础组件之Pipeline
Reference:【HuggingFace Transformers-入门篇】基础组件之Pipeline,Huggingface NLP Course
Transformers
库中最基本的对象是函数。pipeline()将模型与其必要的预处理和后处理(Post
Processing)步骤联系起来,允许我们直接输入任何文本并获得可理解的答案。
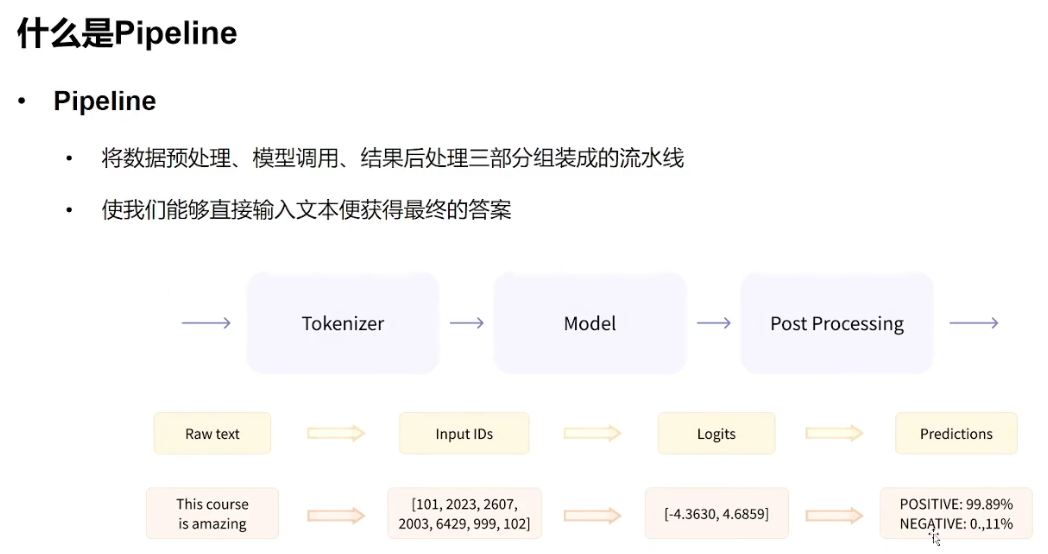 默认情况下,pipeline选择一个特定的预训练模型,该模型已针对指定的任务进行了微调。创建对象时,将下载并缓存模型。如果重新运行该命令,将改用缓存的模型,无需再次下载该模型。
查看Pipeline支持的任务类型
support_tasks可以查看支持的任务类型,导入包的时候报错。
 按照报错提示更新对应包后重新运行。
pip install -U ipywidgets 
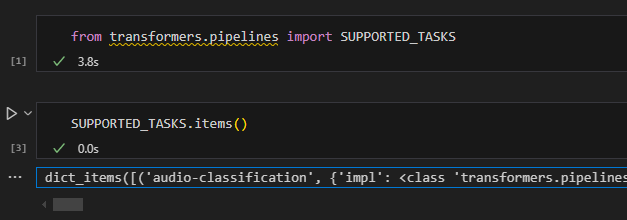 打印出来,可以看到支持的任务名,其中
default字段描述了任务默认使用的pytorch模型是哪一个。
1 | |
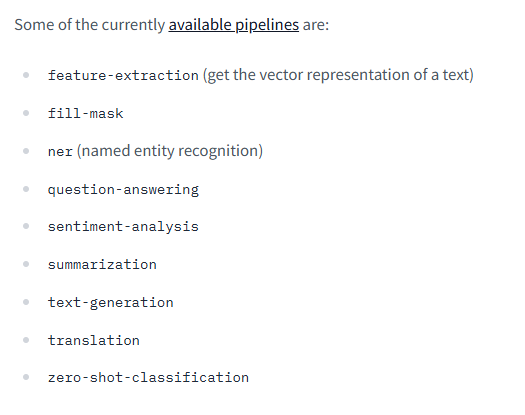
 huggingface transformers的官网说明也有。
Pipeline的创建与使用方式
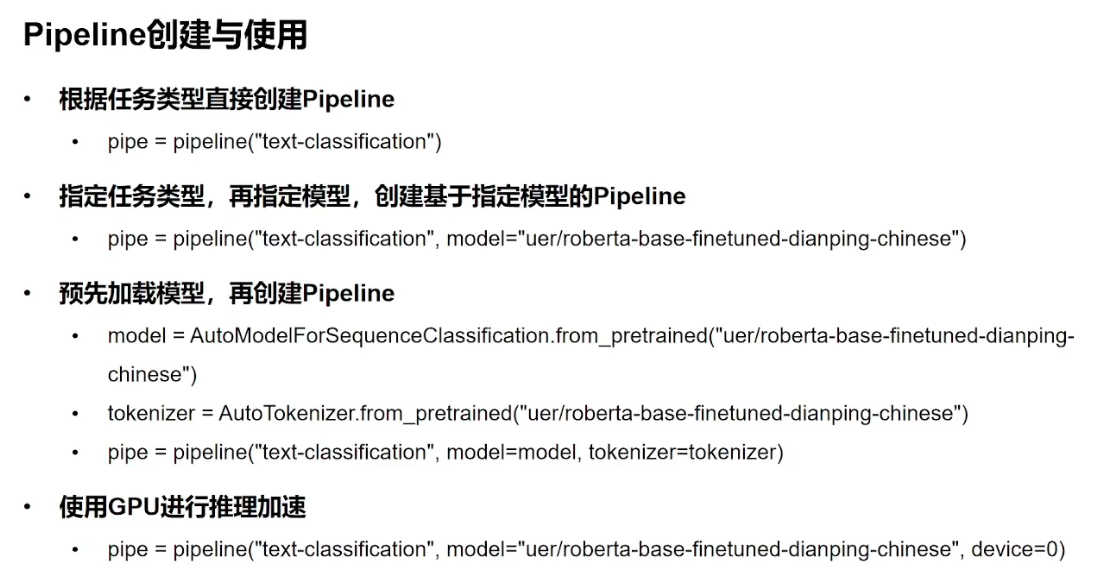
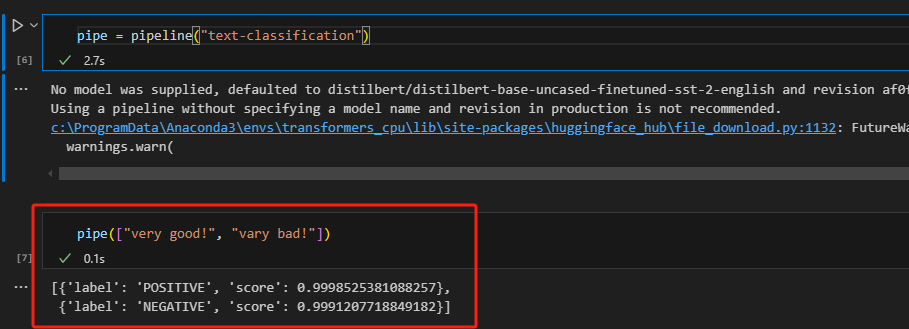
根据任务类型直接创建Pipeline
这里warning的原因是因为没有指定模型,所以他自动给你分配了默认模型。
1
2
3
from transformers import pipeline
pipe = pipeline("text-classification")
print(pipe(["very good!", "vary bad!"]))

指定任务类型、指定模型,创建基于指定模型的Pipeline
官网这里可以查看所有hugging
face支持的model。 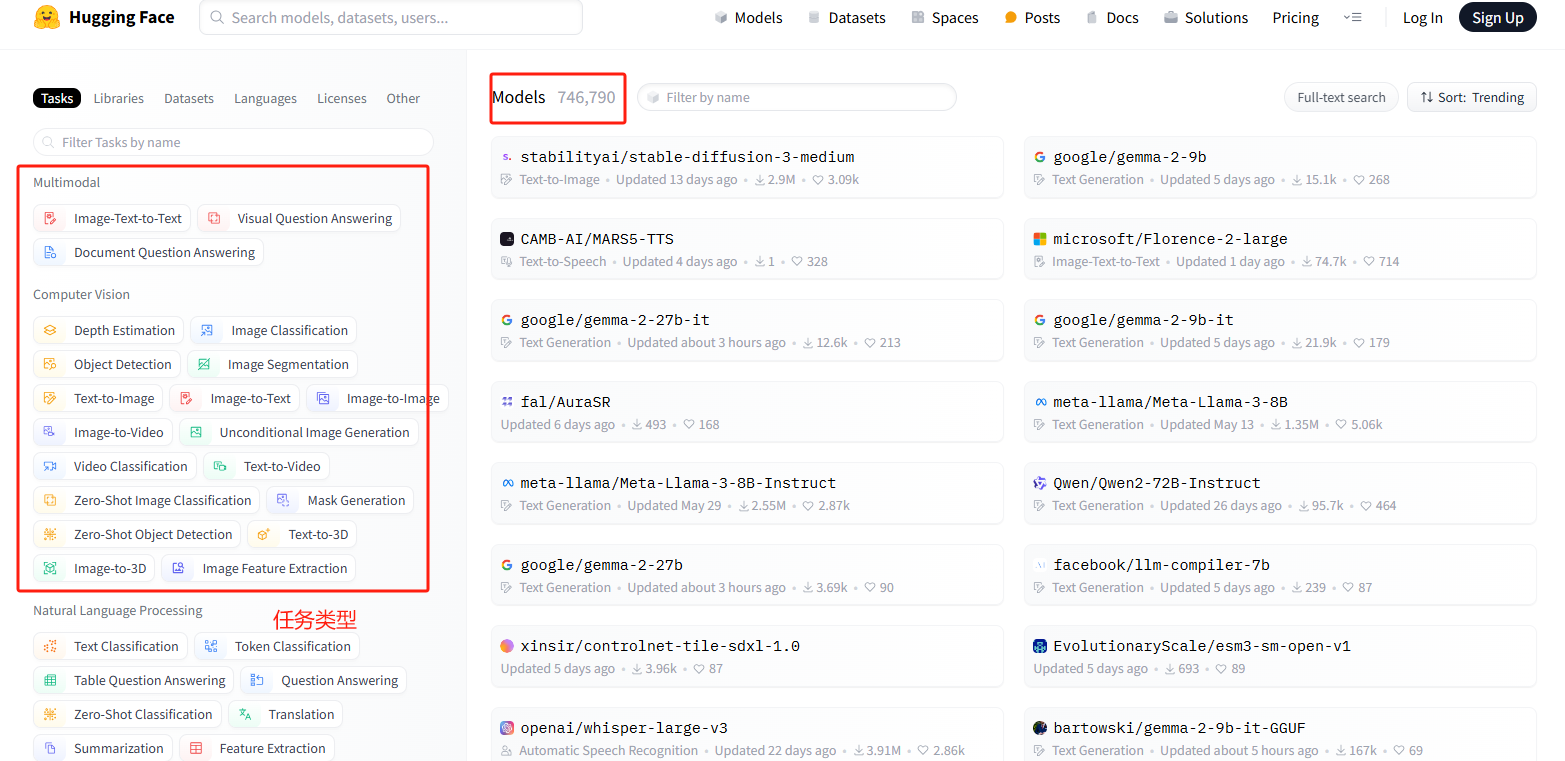 很多默认的模型都是英文,这里可以指定一个中文模型,即添加参数
model。
1 | |

预先加载模型,再创建Pipeline
使用这种方式时,必须同时指定model和tokenizer,不然会报错。
1 | |

使用GPU进行推理
因为我这电脑不行,只有cpu,没法演示gpu运行的效果。(掩面痛哭.jpg)
1 | |

查看进行文本分类任务所用的时间代码如下。因为我装的是cpu版本,所以运行不了,会报一个AssertionError:
Torch not compiled with CUDA enabled的错,装了cuda版pytorch的就不会。
1
2
3
4
5
6
7
8
9
10
11
12import torch
import time
times = []
for i in range(100):
torch.cuda.synchronize()
start = time.time()
pipe("我觉得不太行!")
torch.cuda.synchronize()
end = time.time()
times.append(end - start)
print(sum(times) / 100)
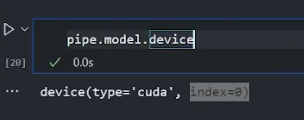
指定在第几块cpu上运行的代码如下,即添加参数device。显卡是从0开始的,是数字0不是字符串0。
1 | |
指定成功的话运行效果如图。第一次使用gpu跑的时候较慢,多跑几次就快了(可能是要热热身吧)。cpu运行约20ms,gpu在6-8ms摆动。
查看Pipeline参数
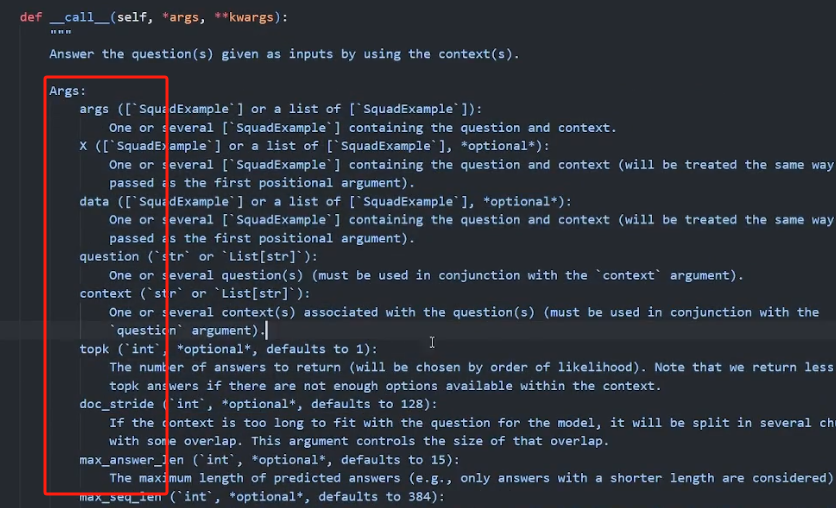
pipeline的参数有很多个,具体字段可以去官网查,也可以用以下方法查看。 定义一个qa_pipe后,发现它是属于QuestionAnsweringPipeline这个类的,代码中输入这个类然后按住Ctrl点积,即可查看这个类里参数的细节说明。
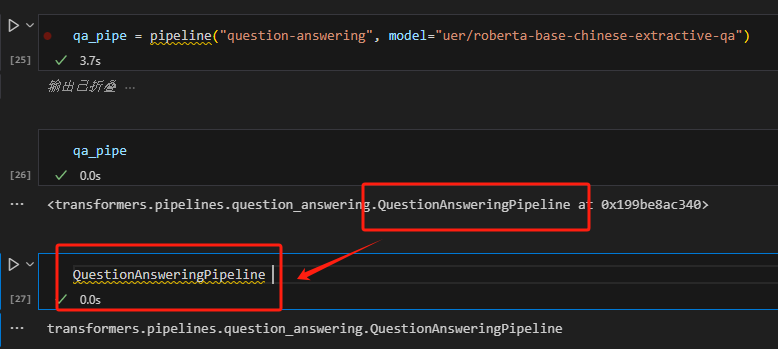 找到call方法,里面的args就是具体的参数说明。
其他Pipeline示例
这是一个目标检测的示例。 1
2
3
4
5
6
7
8
9
10
11
12
13
14
15
16
17
18
19
20
21checkpoint = "google/owlvit-base-patch32"
detector = pipeline(model=checkpoint, task="zero-shot-object-detection")
import requests
from PIL import Image,ImageDraw
url = "https://unsplash.com/photos/oj0zeY2Ltk4/download?ixid=MnwxMjA3fDB8MXxzZWFyY2h8MTR8fHBpY25pY3xlbnwwfHx8fDE2Nzc0OTE1NDk&force=true&w=640"
im = Image.open(requests.get(url, stream=True).raw)
predictions = detector(
im,
candidate_labels=["hat", "sunglasses", "book"],
)
draw = ImageDraw.Draw(im)
for prediction in predictions:
box = prediction["box"]
label = prediction["label"]
score = prediction["score"]
xmin, ymin, xmax, ymax = box.values()
draw.rectangle((xmin, ymin, xmax, ymax), outline="red", width=1)
draw.text((xmin, ymin), f"{label}: {round(score,2)}", fill="red")
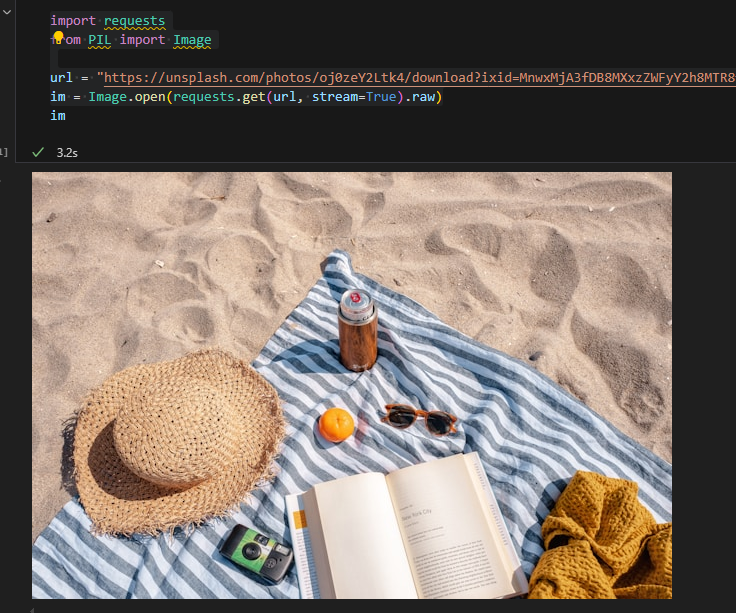
给定一张图片。
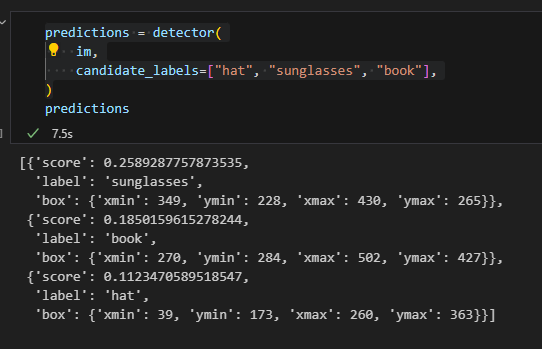
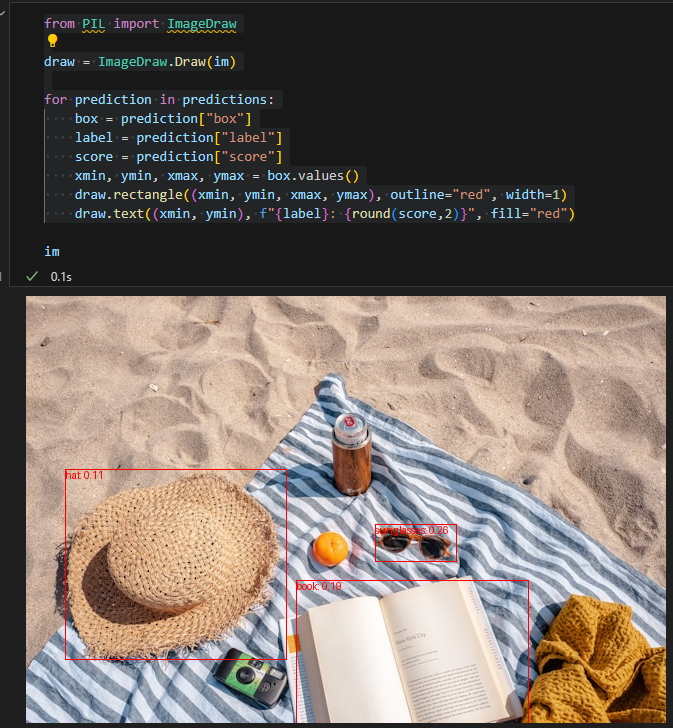
输入检测目标,输出检测结果。
解析Pipeline背后的实现过程
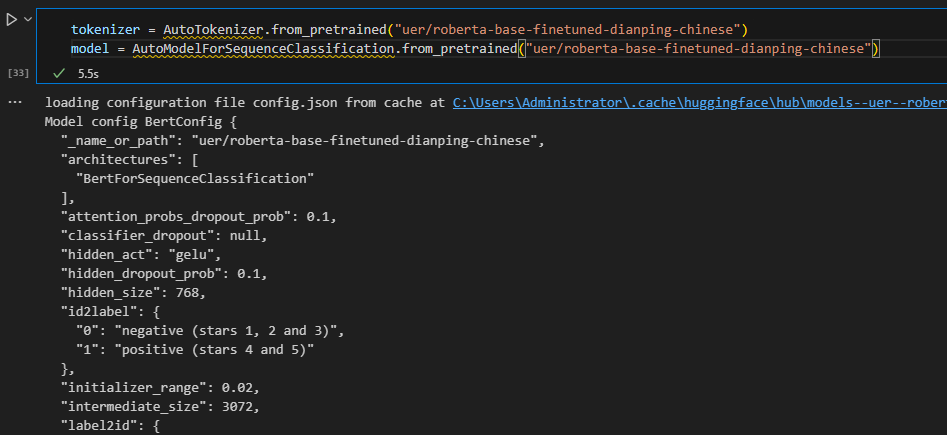
1. 定义并加载分词器和模型。
1 | |
2. 输入目标文本并进行分词。
1 | |

3. 将input塞给模型,rec包括模型输出的所有信息。
1 | |

4. 提取出logits字段,将其进行归一化即softmax后的值是进行文本分类的依据。
1 | |

5. 提取出softmax后logits字段中最大的值的索引id,这里是0。
1 | |

6. id2label方法会将索引id映射为标签,0对应negative,1对应positive。
1 | |

7. 打印分类结果。
1 | |

代码汇总
以注释为分割线,单独运行每块代码。 1
2
3
4
5
6
7
8
9
10
11
12
13
14
15
16
17
18
19
20
21
22
23
24
25
26
27
28
29
30
31
32
33
34
35
36
37
38
39
40
41
42
43
44
45
46
47
48
49
50
51
52
53
54
55
56
57
58
59
60
61
62
63
64
65
66
67
68from transformers import *
from transformers.pipelines import SUPPORTED_TASKS
# 查看支持的任务类型
for k, v in SUPPORTED_TASKS.items():
print(k, v)
# 根据任务直接创建pipeline
pipe = pipeline("text-classification")
print(pipe(["very good!", "vary bad!"]))
# 指定任务类型、指定模型,创建基于指定模型的Pipeline
pipe = pipeline("text-classification", model="uer/roberta-base-finetuned-dianping-chinese")
print(pipe("我觉得不太行!"))
# 预先加载模型,再创建Pipeline
# 这种方式,必须同时指定model和tokenizer
model = AutoModelForSequenceClassification.from_pretrained("uer/roberta-base-finetuned-dianping-chinese")
tokenizer = AutoTokenizer.from_pretrained("uer/roberta-base-finetuned-dianping-chinese")
pipe = pipeline("text-classification", model=model, tokenizer=tokenizer)
print(pipe("我觉得不太行!"))
# 使用GPU进行推理
print(pipe.model.device)
pipe = pipeline("text-classification", model="uer/roberta-base-finetuned-dianping-chinese", device=0)
# 其他pipeline实例
checkpoint = "google/owlvit-base-patch32"
detector = pipeline(model=checkpoint, task="zero-shot-object-detection")

import requests
from PIL import Image,ImageDraw

url = "https://unsplash.com/photos/oj0zeY2Ltk4/download?ixid=MnwxMjA3fDB8MXxzZWFyY2h8MTR8fHBpY25pY3xlbnwwfHx8fDE2Nzc0OTE1NDk&force=true&w=640"
im = Image.open(requests.get(url, stream=True).raw)
predictions = detector(
    im,
    candidate_labels=["hat", "sunglasses", "book"],
)

draw = ImageDraw.Draw(im)
for prediction in predictions:
    box = prediction["box"]
    label = prediction["label"]
    score = prediction["score"]
    xmin, ymin, xmax, ymax = box.values()
    draw.rectangle((xmin, ymin, xmax, ymax), outline="red", width=1)
    draw.text((xmin, ymin), f"{label}: {round(score,2)}", fill="red")
# 解析Pipeline背后的实现过程
import torch
tokenizer = AutoTokenizer.from_pretrained("uer/roberta-base-finetuned-dianping-chinese")
model = AutoModelForSequenceClassification.from_pretrained("uer/roberta-base-finetuned-dianping-chinese")
input_text = "我觉得不太行!"
inputs = tokenizer(input_text, return_tensors="pt")
res = model(**inputs)
logits = res.logits
logits = torch.softmax(logits, dim=-1)
pred = torch.argmax(logits).item()
result = model.config.id2label.get(pred)
print(result)